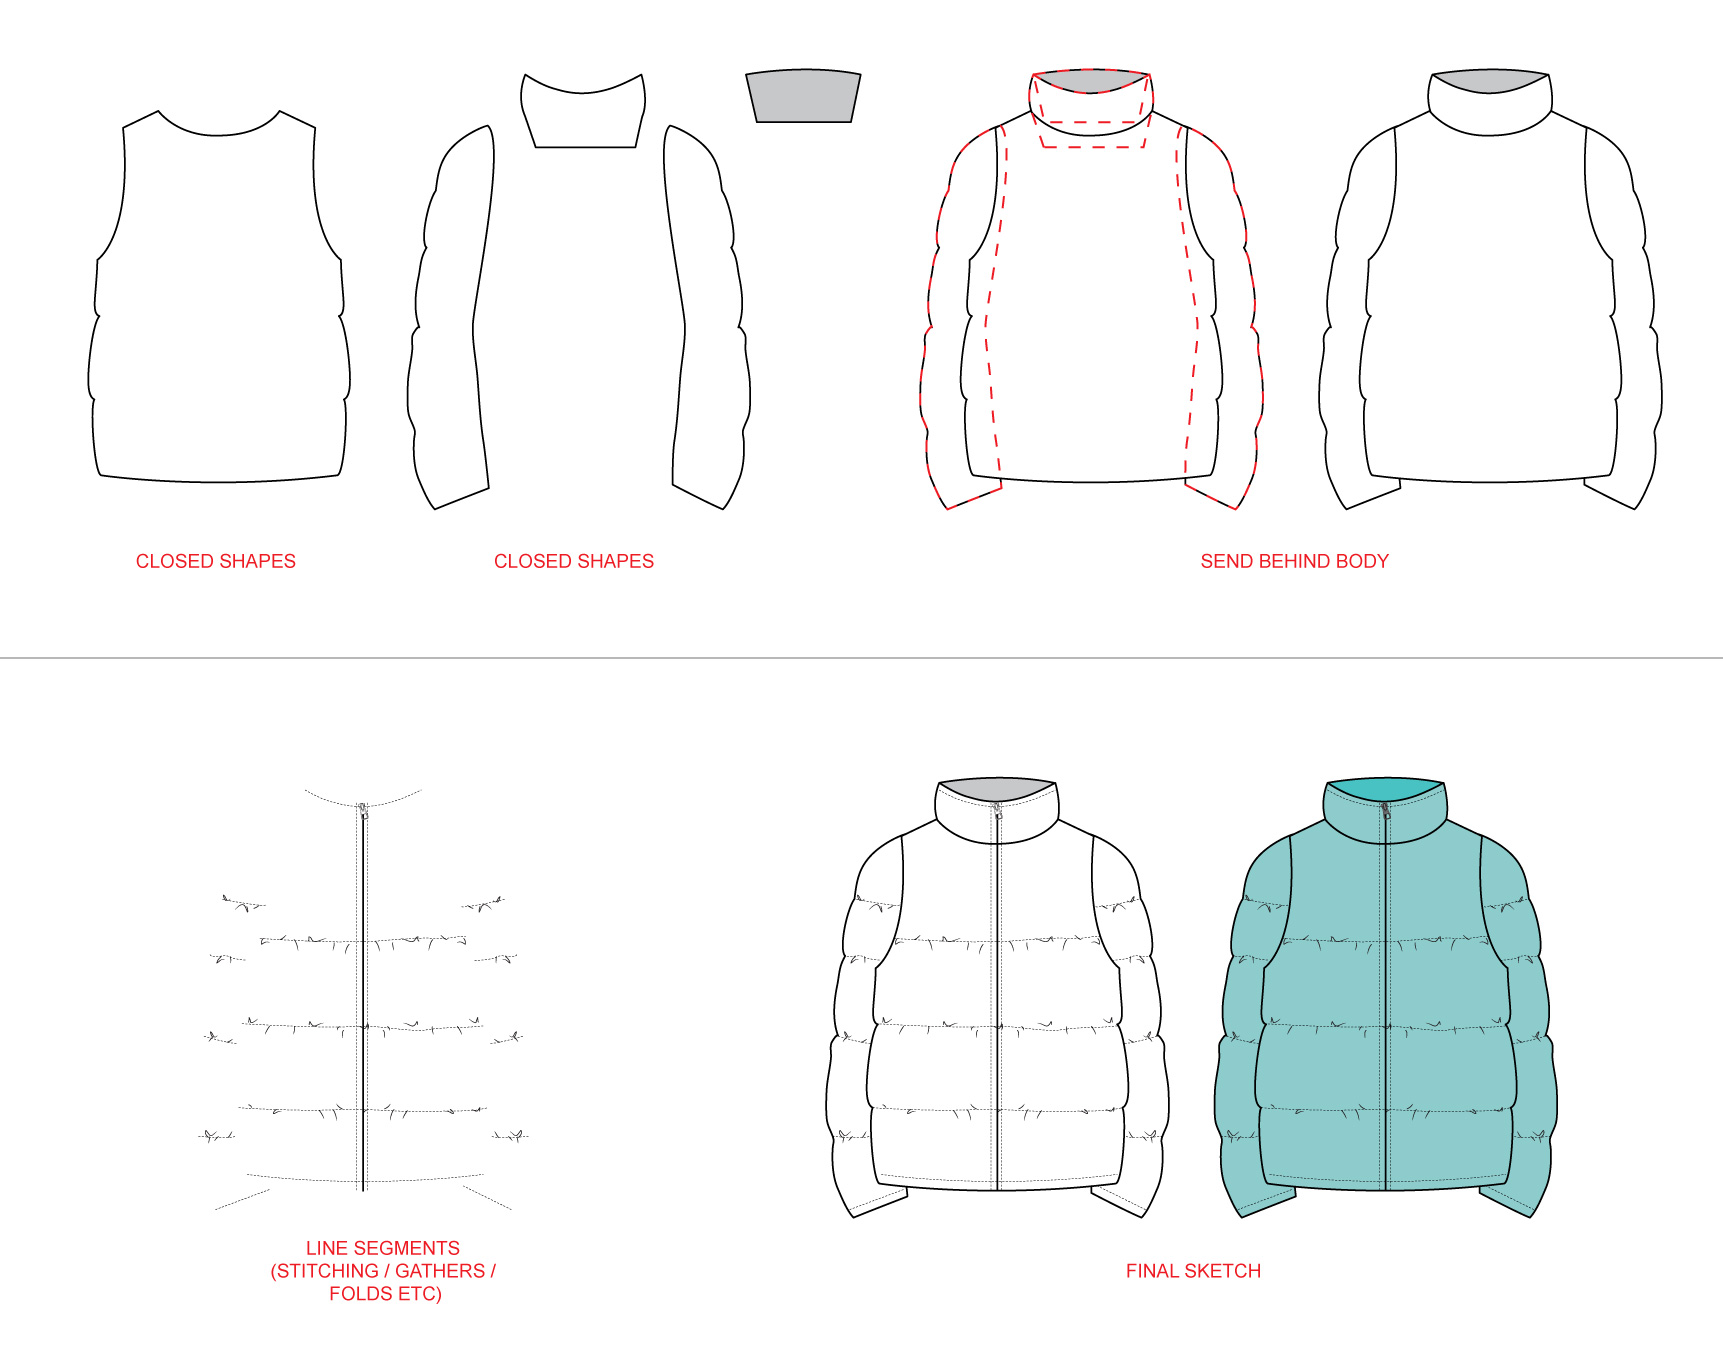
Break Down the Parts of a Garment
One of the hardest parts of drawing your garment flats in Adobe Illustrator is figuring out all the different pieces and how they all come together. Here is an updated posted with more illustrations to hopefully give you better insight as to how to approach your garments.
I always tell my students to look at the garment first, analyze it in your mind before you start clicking on your mouse! Figuring out a general idea of how you are going to draw the fashion flat will save you time fixing your mistakes.
Before beginning a new sketch you need to look at all the components that will make up the garment.
- First identify which areas will have their own fill color. These will be closed shapes. On this pant below I have 3 different fill colors: Medium grey for the main pant. Dark grey for the waistband and light grey for the belt loops.
- Any other elements can just be line segments instead of full closed shapes.
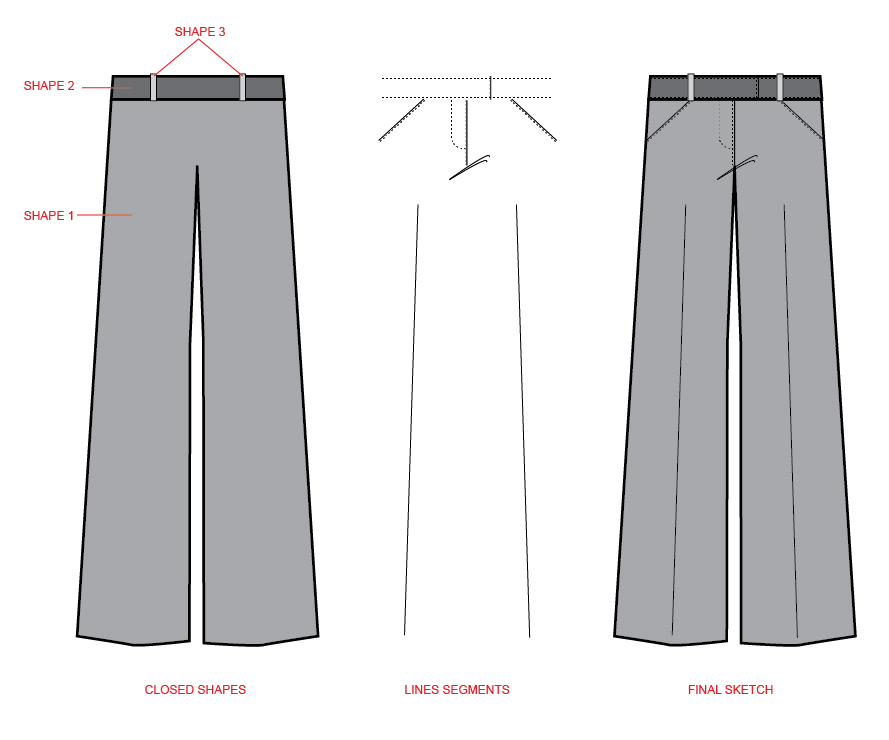
Remember there are many ways to draw a garment. Here is just one way that I think is easy and give you more flexibility with your garments in case you want to remove / re-position pieces like the sleeves or collar. Check out this post to see what I mean: https://www.thefashionprofessor.com/drawing-a-garment-with-sleeves/
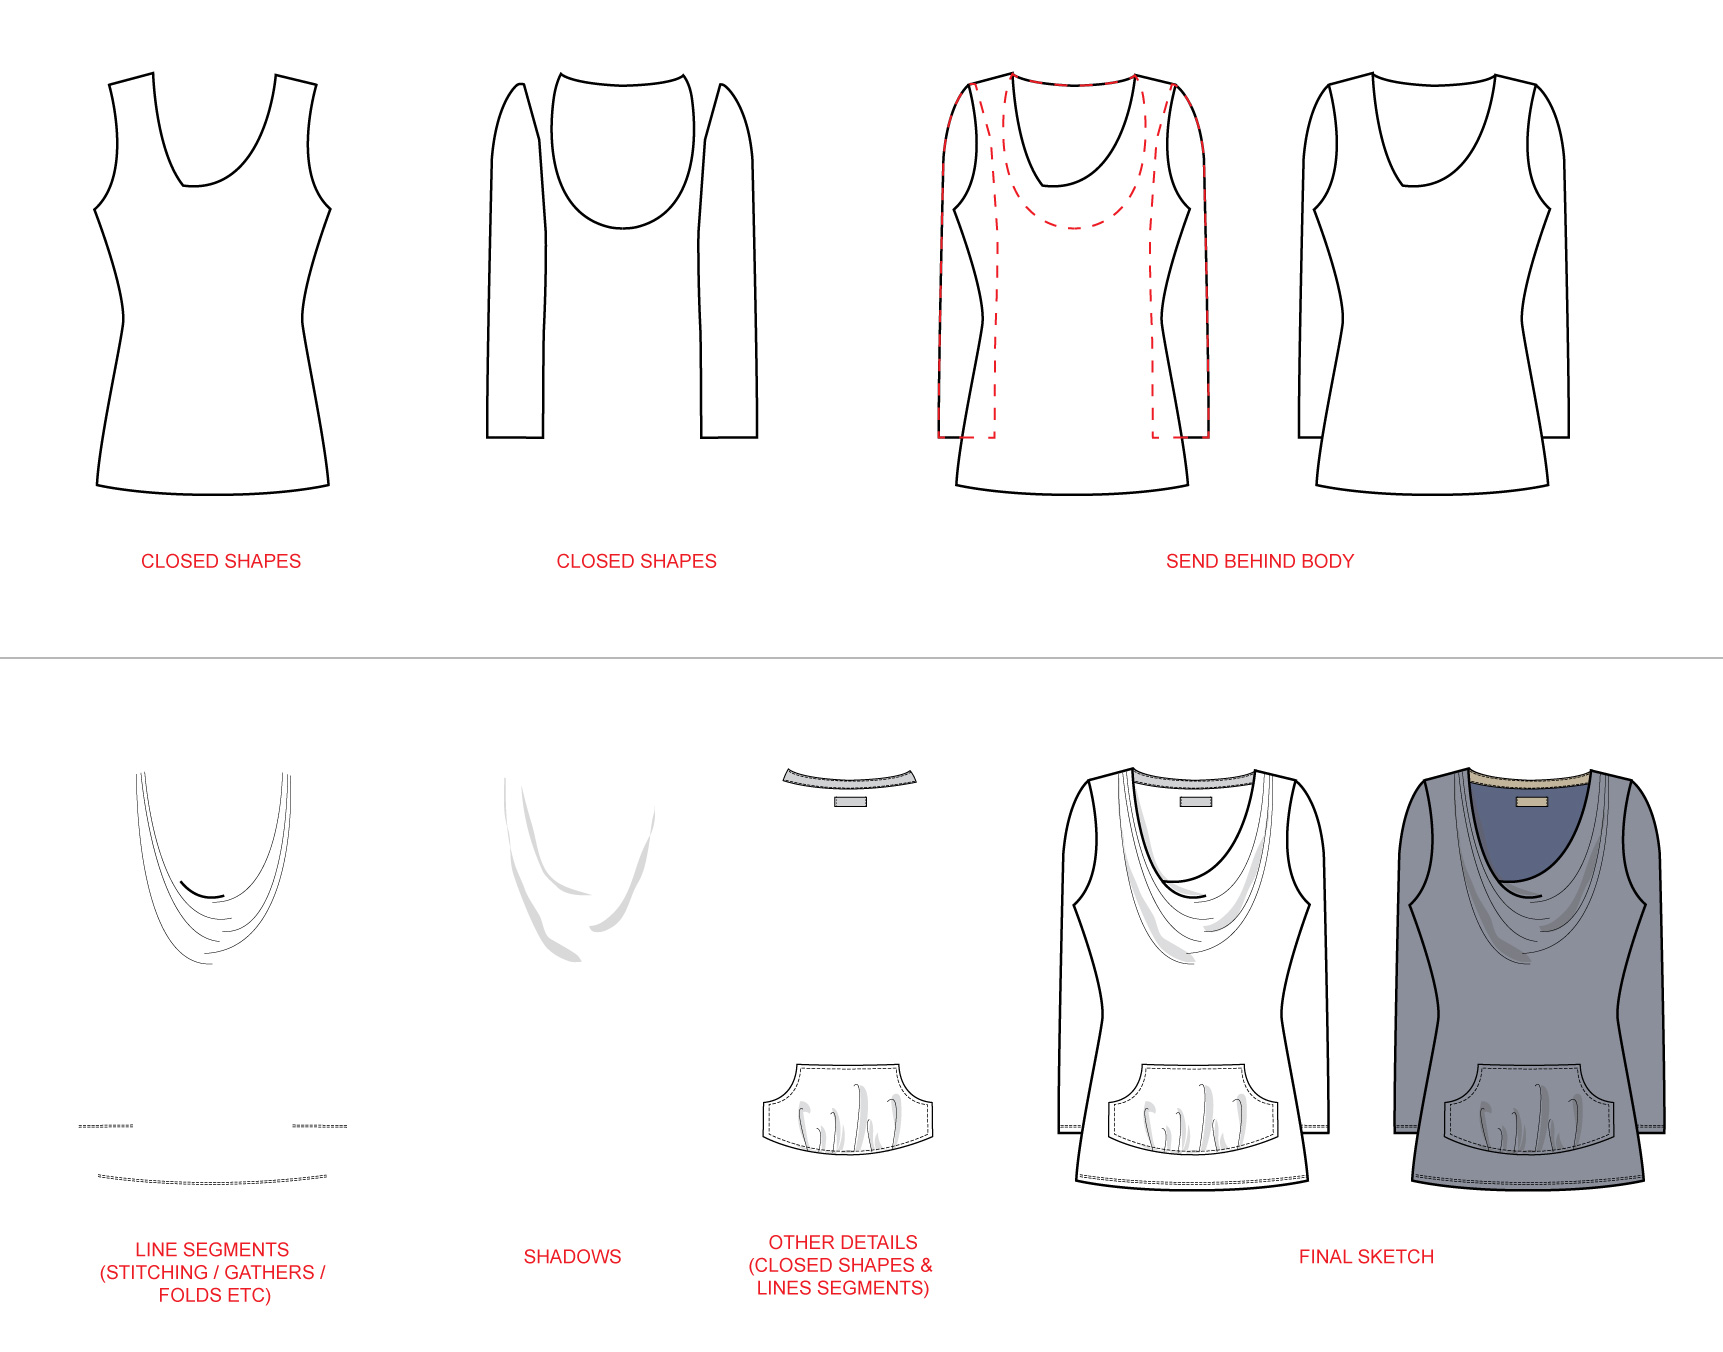
And another example: Click on image to enlarge.